Conservation of the Tapestries from the Spangled Bedroom at National Trust Property Knole by May Berkouwer Textile Conservation
This is our second Bulletin regarding the conservation work we are undertaking on the Tapestries from National Trust property Knole in Kent:-
Bulletin 2: Preparation and Framing Up, January 2017
Following on from our previous bulletin about sourcing and preparing the threads and yarns used in conservation, the next stage is to prepare the tapestry and to mount it onto a frame ready for the stitching treatment.
Preparing the Tapestry
Tapestries generally have, what is known as, a galloon around the edge on all four sides. The galloon is the final part of the border, nearly always a single colour (often dark blue) that is either woven into the tapestry or added as a separate strip.
The galloons on the Spangled Bedroom tapestries had been folded back and stitched in place to neaten the edges.
Prior to wet cleaning, these folded galloon edges had to be unpicked and the galloons laid flat. Often these folds are a dark cosy place for insects to reside and feed and once unfolded, insect damage such as moth holes often become evident. This was the case in these tapestries along with damage from previous fixing methods.
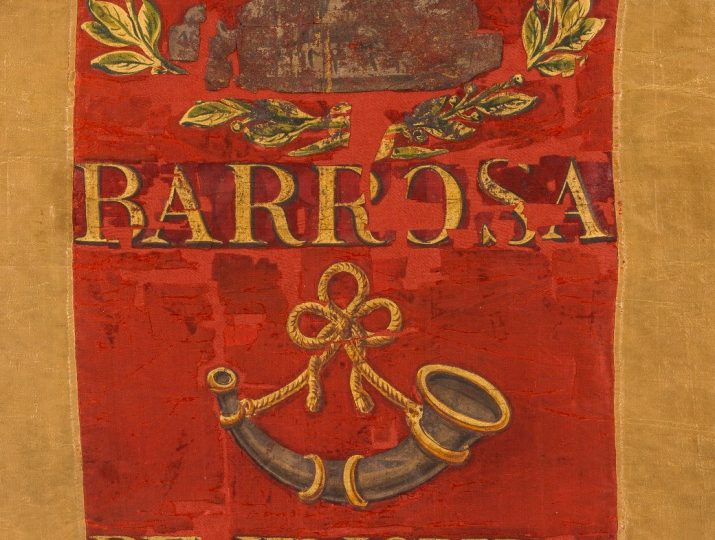
The galloons will now be repaired and the decision was made to leave them open at the top and bottom to fully reveal the weaver’s mark on the lower edge.
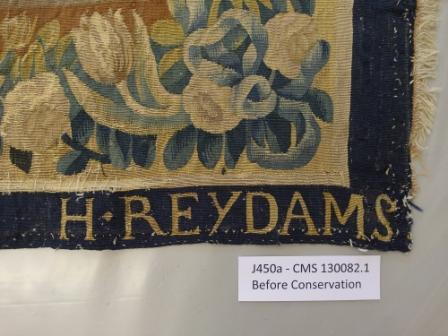
Weaver’s name lower right corner before conservation
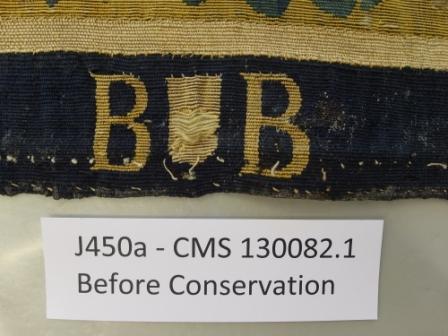
Weaver’s mark on the lower edge before conservation; this shows the tapestry was woven in city of Brussels
Although the tapestries have been wet cleaned they are still given a surface clean with a vacuum on low suction to remove loose silk dust on both the front and reverse prior to framing up.
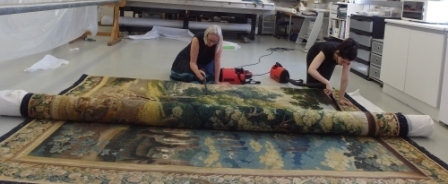
May and Maria vacuuming the reverse of the tapestry
It is at this stage the original colours of the tapestry can be appreciated on the reverse compared to the faded colours evident on the front.
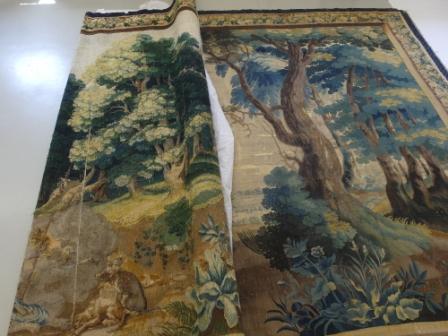
The colour change on the front of the tapestry (right) compared to the reverse (left). Note the dramatic change in the green foliage to blue. This is due to the faster fading of the yellow dye than the blue dye which are combined to produce the final green intended in the original.
A full photographic record of the reverse is taken to document the true colours as this is the last opportunity to truly appreciate them before the reverse is covered with the linen backing needed for the support treatment.
Preparing the Linen Support Fabric
The linen we are using is a fine linen scrim, chosen to complement the fine weave of the tapestries.
This is put through several boil washes without detergent to remove any dressings and finishes used in the manufacturing process. This boiling also pre-shrinks the linen to avoid any shrinkage at a later date.
Once scoured and pre-shrunk the linen is pressed to remove any creasing caused during the boiling process. Great care must be taken at this stage to keep the grain of the fabric straight so as to not distort the linen in any way.
The linen is available in widths of 2.10m, so several widths need to be joined together to cover the full size of the tapestry at 4m 62cm wide.
The lengths of linen are seamed together by hand and marked out into sections ready to attach to the reverse of the tapestry.
Framing Up
A tapestry frame consists of three rollers. The tapestry is rolled onto the back roller with the linen rolled onto the middle roller. The tapestry is put onto the frame sideways, rolling with the warp which runs from side to side, not top to bottom.
Both the linen and the tapestry are then pulled forward and attached to the front roller with the linen underneath the tapestry ready to be held in place with the conservation stitching.
Once framed up, the stitch treatment can begin. We work from the front roller and roll through the tapestry in sections working from the left side edge rolling through to the right side edge.
Our conservation stitching is progressing well and we are now over a third of the way through the tapestry. We will look at the stitching technique in our next bulletin.
More informative posts and blogs can be found on our Studio’s website via http://www.mbtexcon.co.uk/
